Streamlining the editing experience: Setting up tab permissions
Log in to add to favouritesThis article explains how to set up two basic roles to manage the process of creating and publishing a course content type. By the end of this article you should understand the principles of setting up a role, assigning permissions, and adding users to a role.
We'll set up roles to support the following scenario:
- Course authors can create courses, but not publish or delete them. They will be prevented from updating the SEO/Social content for the course.
- Course administrators are the only people on the team who can edit the SEO/Social content and publish the course.
Creating the roles
We'll start the process by creating the Course author role. Head over to the roles screen by selecting Settings from the sidebar, and selecting Roles from the menu. If you don't see the Roles option in the menu, you'll need to ask a system administrator to add you to the Roles Administrator group.
With the roles listing screen open, select New role. Enter a name for the role - in this example we'll use the name Course authors. We'll provide an optional description to make clear what the role is for at a later date.
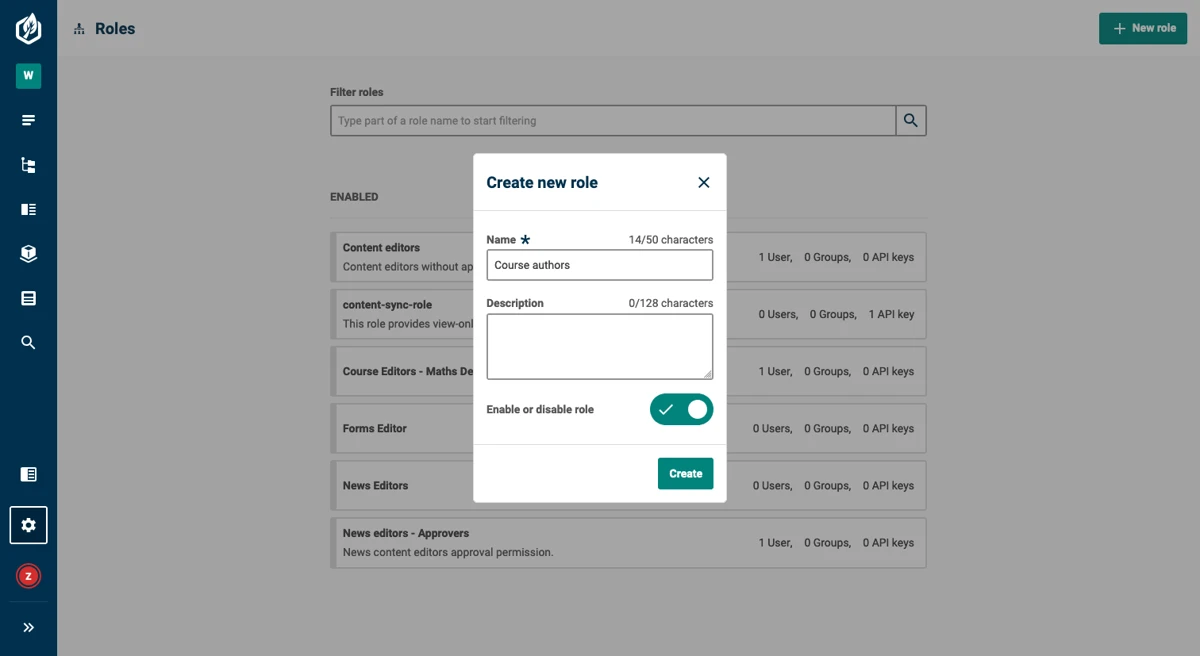
With the role details populated, press Create. The roles builder will be displayed.
We can now begin the process of adding the appropriate permissions for the role. As we are setting up permissions for entries, select the Entries permission from the toolbox and it will be added to the permissions list
The newly added Entries permission will be active, and its properties are displayed in the properties panel. Select the content type that you want to set permissions for from the dropdown list - in this case the Course content type.
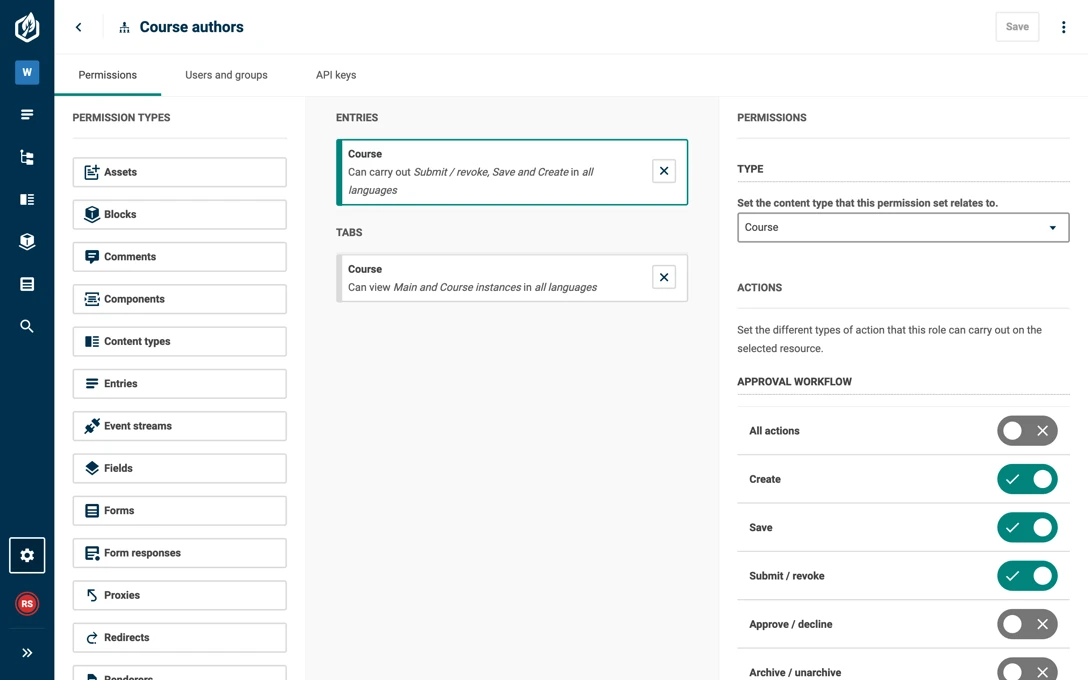
Set up workflow actions
A list of workflow actions will be displayed following the selection of the content type. Permissions need to be explicitly set. By default all permissions are switched off. Toggling the permission turns it on. For the Course content type we'll enable the following permissions:
| Create | Save | Submit/revoke | Approve/decline | Delete |
|---|---|---|---|---|
| ✅ Yes | ✅ Yes | ✅ Yes | ❌ No | ❌ No |
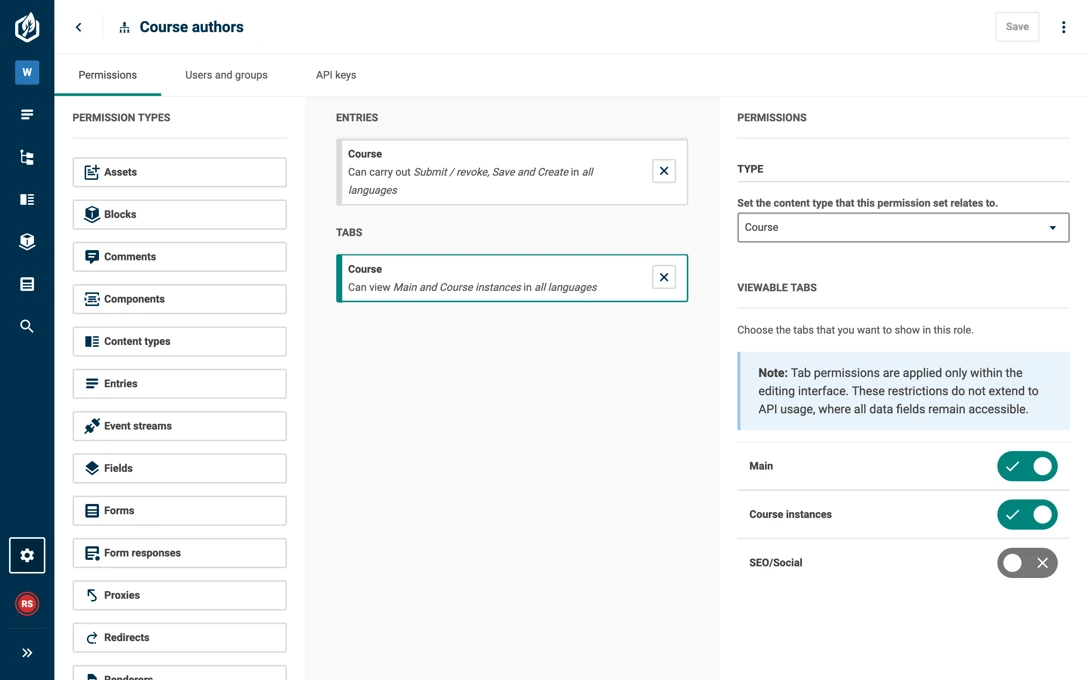
Set up tab permissions
Once you've configured your entry permissions you'll need to set up the appropriate tab restrictions.
Add a Tab permission from the toolbox, the tab permission will be selected and you can choose the content type from the properties panel you want to set tab permissions for. Once selected you'll see a list of tabs displayed. Simply toggle the tabs that you do not want to be enabled into the off position. For the Course content type we'll enable the following tabs:
| Main | Course details | SEO/Social |
|---|---|---|
| ✅ Yes | ✅ Yes | ❌ No |
With the permissions now set up for the Course authors, we'll press Save and begin to assign users who can carry out the actions assigned to the role.
Assigning users to the role
Select the Users and groups tab, two empty lists will be isplayed. One for users and the other groups. We'll type the name of a user for this example in the users search box to add to the role.

With the user assigned, and Entry and Tab permissions set we'll press Save and move on to creating the next role.
The Course administrator
The Course administrator role has a completely different set of permissions, but the process is the same. Create a new role called Course administrators and set the workflow actions of, Save, Approve/decline and Delete.
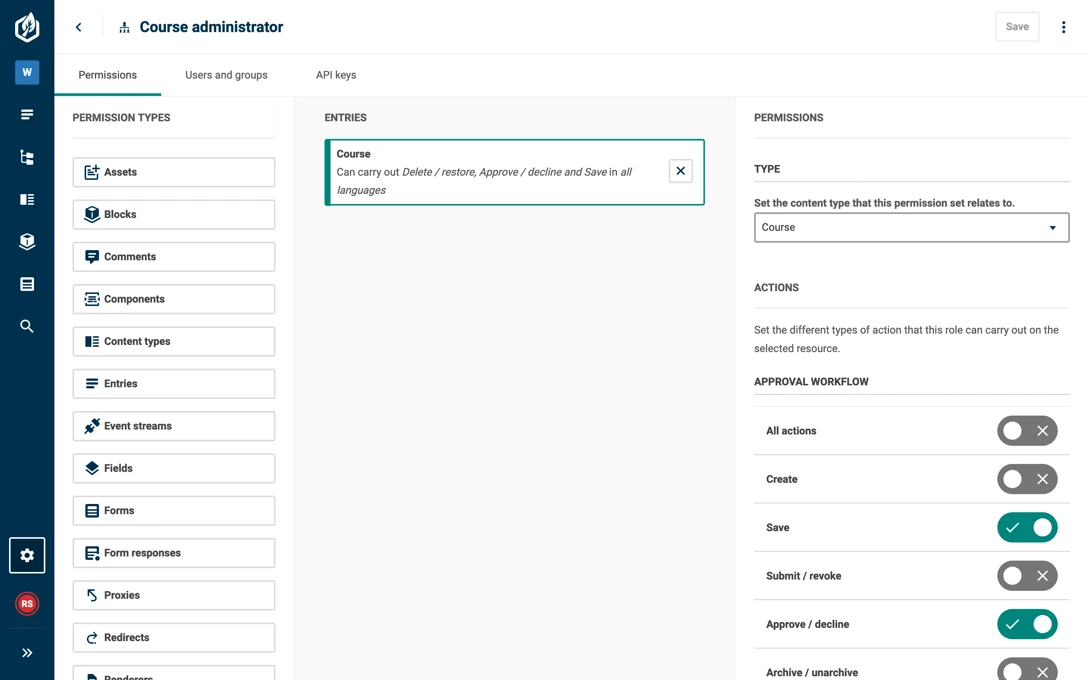
The user that we assign to the role won't be able to create entries, save any changes, or submit the content for approval.
| Create | Save | Submit/revoke | Approve/decline | Delete |
|---|---|---|---|---|
| ❌ No | ✅ Yes | ❌ No | ✅ Yes | ✅ Yes |
For this new role, we want the Course administrator to be able to edit content in all tabs. We don't need to add any permissions to support this as all tabs are enabled by default.
Testing the roles
Once the roles have been set up, you will have the following roles defined.
- Course authors – can create, update and submit course entries, but they will not be able to see the SEO/Social tab.
- Course administrators – can update fields in the SEO/Social tab.
The Contensis interface will adapt to the permissions that are assigned to the role for the logged-in user.
The following screenshots provide a snapshot of how the interface will be displayed for the different users that have been assigned to the role.
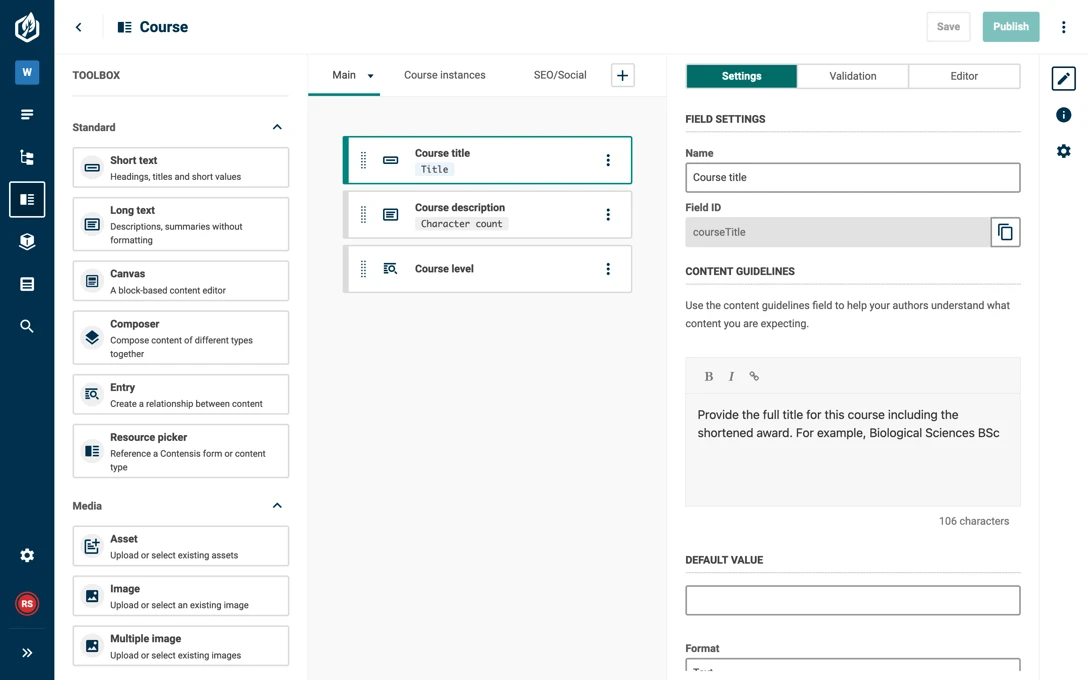
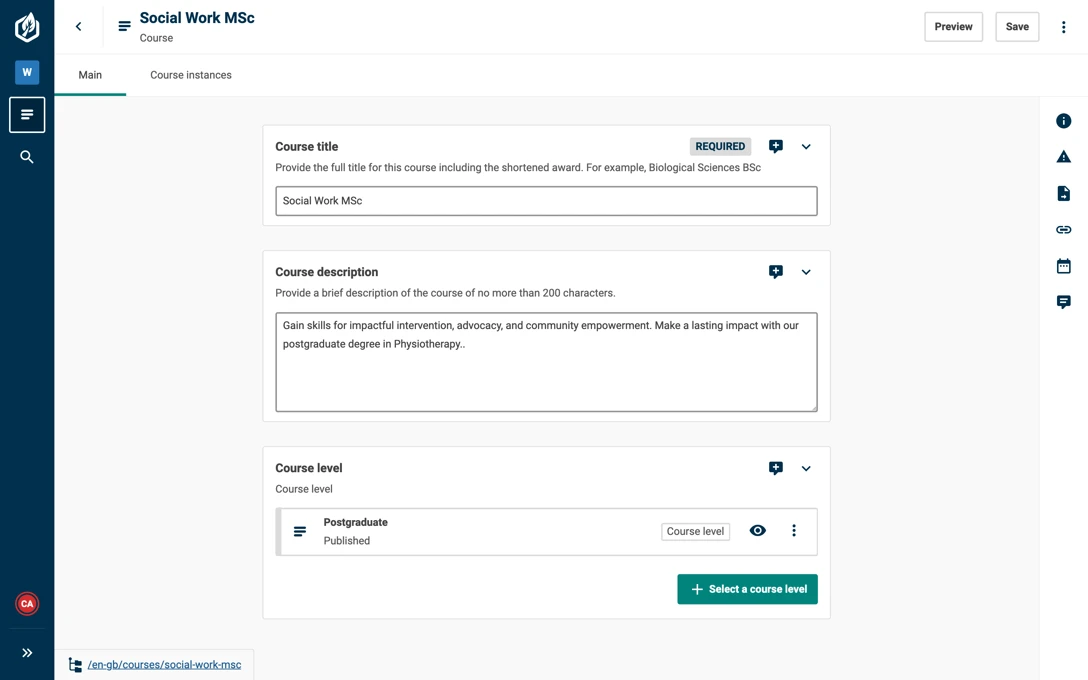
Course author
The entry editor is displayed as it would be for a member of the Course author role. The author can create and update the entry, but they can't see the SEO/Social tab.
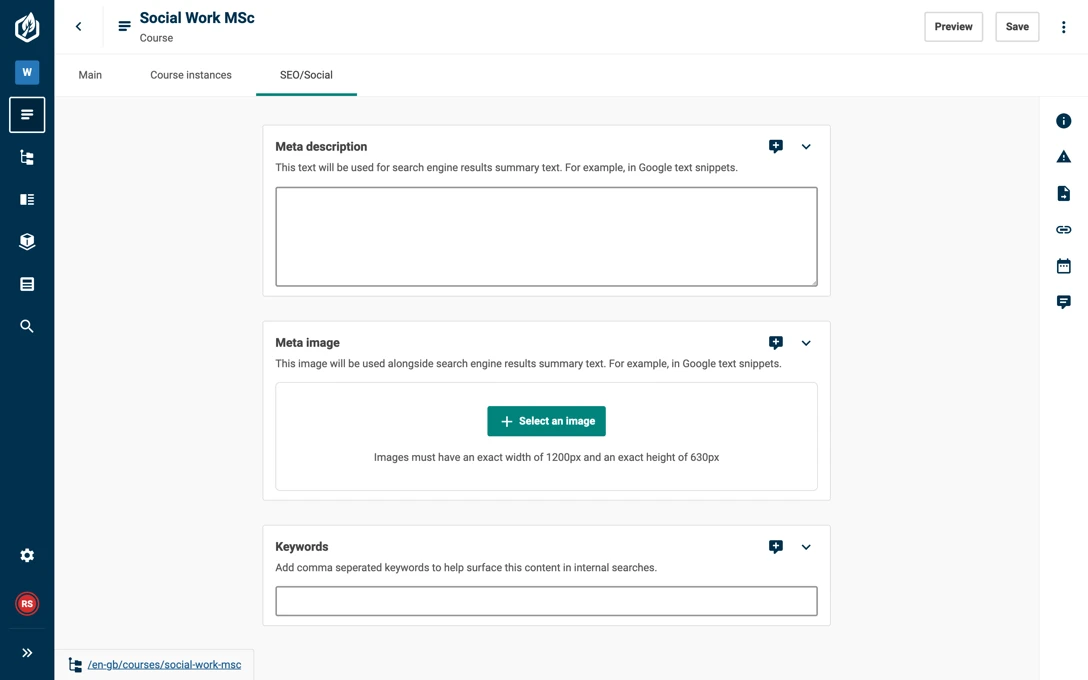
Course administrator
The entry editor is displayed as it would be for a member of the Content administrator role. The administrator can view and edit the content in the SEO/Social tab.
Summary
We've created two roles that have different permissions applied.
- A Course author, someone who can edit content across multiple tabs, but restricted from editing content in the SEO/Social tab.
- A Course administrator, someone who can edit the entire entry including fields in the SEO/Social tab.
These roles can easily be expanded to support additional content types or different permissions. When experimenting with these roles for the first time, we recommend assigning your own user to test the role and prevent any unauthorised access.
For a detailed breakdown of the stages for creating a role take a look at our roles and permissions articles.