ADFS Single sign on
Log in to add to favouritesPage last updated 09 December 2024
Overview
You can integrate your Active Directory Federation Services (AD FS) instance to help manage seamless single sign-on for the members of your organisation.
The following articles outline the process for configuring AD FS on your Windows server, and how to setup Contensis to use this new configuration. They also cover testing the integration between the two systems.
These articles assume you have access and permission to your AD FS server along with system administrator access to Contensis.
Requirements
- An active directory instance where all users have an email address attribute.
- A server running Microsoft Server 2012 R2, 2012 or 2008 with AD FS installed. This is covered in the following MSDN article: Deploy and configure AD FS.
- An instance of Contensis installed which can access your AD FS login page.
- Your Contensis installation must be accessible on https and use a valid SSL certificate.
Assigning emails to federated CMS users
The following describes the order of precedence when assigning an email to a user after federated login, such as via AD FS or Azure AD.
AD FS
The value of the email claim is assigned.
Azure AD
WsFederation_Azure_PrioritiseUPNForEmailAddress = 0
- Use MicrosoftGraph.User.Mail value, if present.
- Use first of MicrosoftGraph.User.OtherMails addresses, if present.
- Use the UPN, if it is already in an email format.
- Use the username constructed from UPN, if present.
The constructed username will be in the form of an email address.
WsFederation_Azure_PrioritiseUPNForEmailAddress = 1
- Use the UPN, if it is already in an email format.
- Use 'email' claim, if present.
- Use MicrosoftGraph.User.Mail value, if present.
- Use first of MicrosoftGraph.User.OtherMails addresses, if present.
- Use the username constructed from UPN, if present.
The constructed username will be in the form of an email address.
Configure Contensis to use AD FS
With the appropriate trusts and claims setup on your AD FS server, the next step is to login to Contensis and turn on AD FS integration.
- Login to Contensis using an administrative account.
- Navigate to the Management Console and select Global Settings.
- Set the WsFederation_MetadataEndpoint setting to your AD FS URL with /FederationMetadata/2007-06/FederationMetadata.xml appended.
e.g. https://adfs.customername.com/FederationMetadata/2007-06/FederationMetadata.xml.
Note: This must be accessible from your Contensis server.
- Set the WsFederation_Type setting to 1.
- Once you have completed the above steps. Please raise a help desk ticket as our support team will need to restart the application.
Configure your AD FS server
This article outlines the process of configuring your AD FS services on your Windows server to add the necessary trusts and claims for Contensis to integrate with your organisations single sign-on service.
Add the relying party trusts
- Open the AD FS Management console, click Add Relying Party Trust in the Actions pane and press Start on the wizard introduction page.
- Select Enter data about the relying party manually.

- Enter a Display name, e.g. Contensis and press Next.

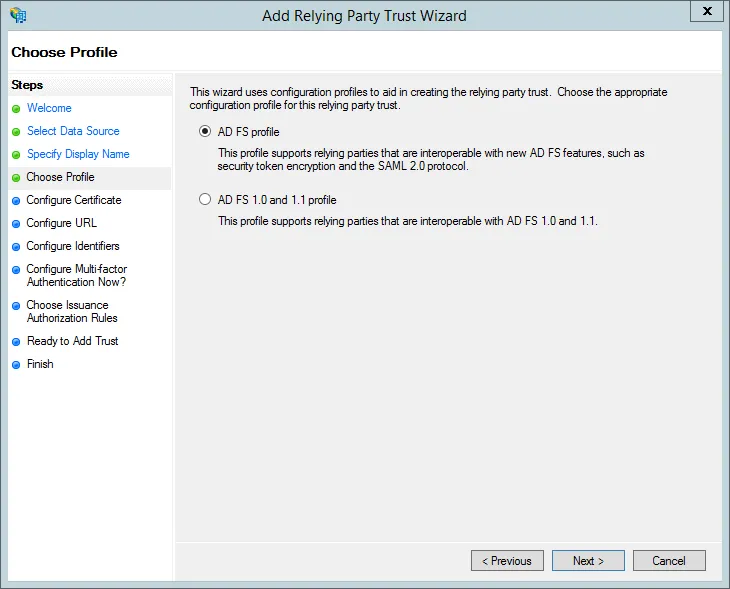
- Select AD FS Profile.
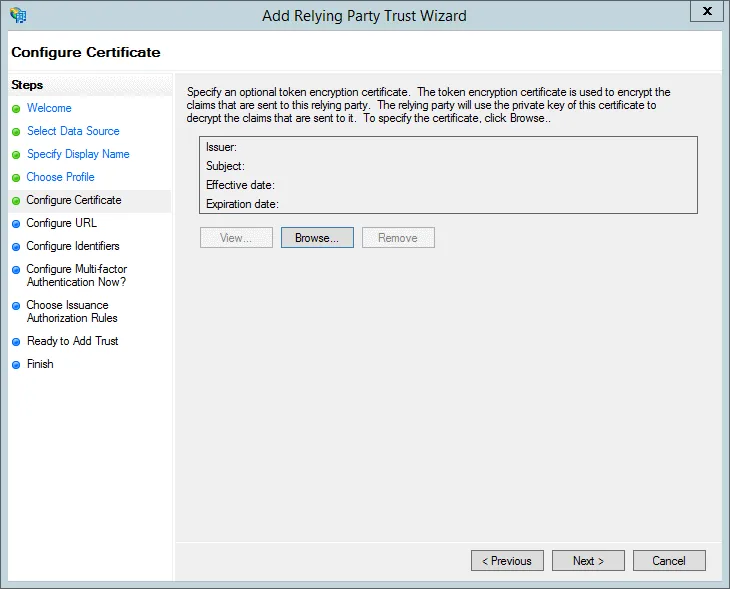
- Skip the Configure Certificate step by pressing Next (it’s not supported by Contensis).
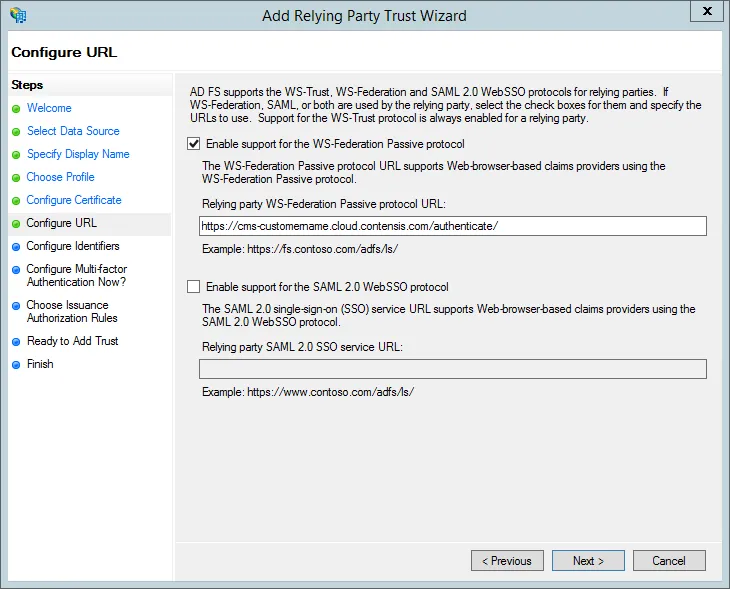
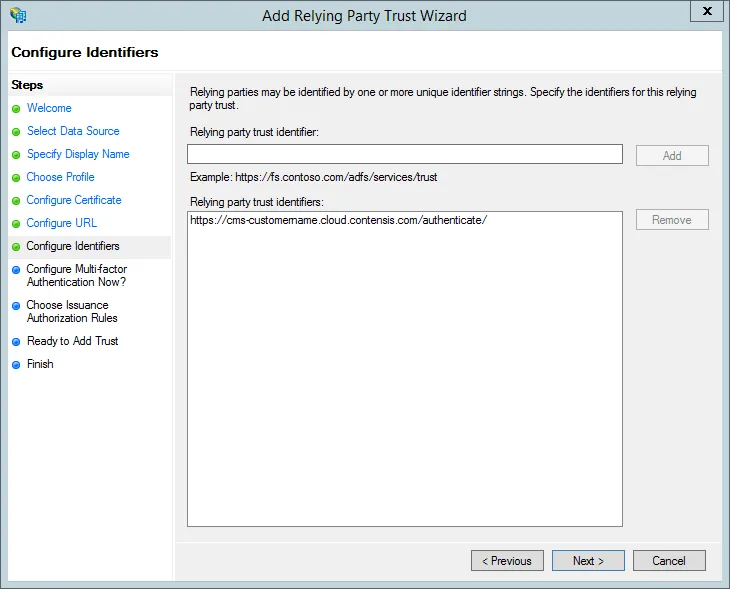
- Select Enable support for the WS-Federation Passive protocol and enter your CMS address with the addition of /authenticate/ on the end and press Next.
e.g. https://cms-customername.cloud.contensis.com/authenticate/
Please make sure you have the trailing end slash as without it the AD FS integration will not work
Note: Contensis must be available on https, non-https will not work.
- Double check the CMS address is correct in the Relying party trust identifiers and then click Next.
- Leave the default option of I do not want to configure multi-factor authentication settings for this relying party trust at this time selected.If you wish to configure multi-factor authentication select the second option. Multi-factor authentication is outside the scope of this article.

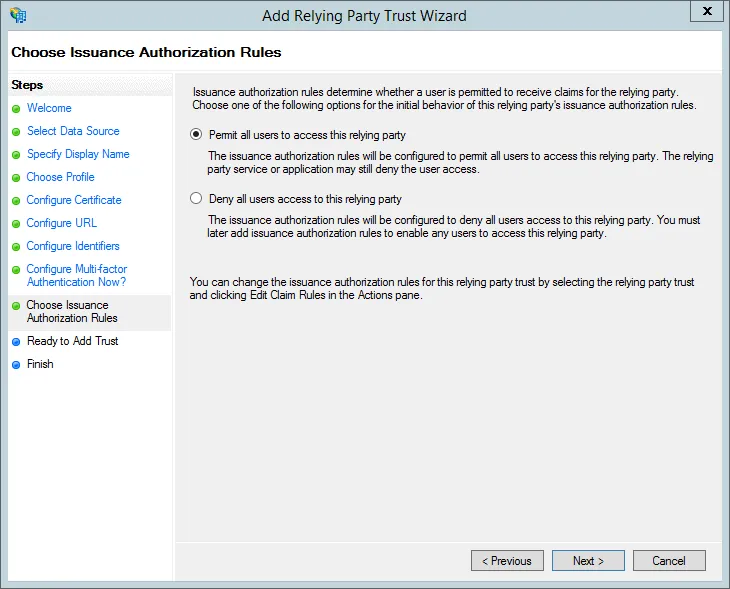
- Select Permit all users to access this relying party and press Next if you want to allow all active directory users to login to Contensis. Alternatively select Deny all users access this relying party if you want to allow specific users later.
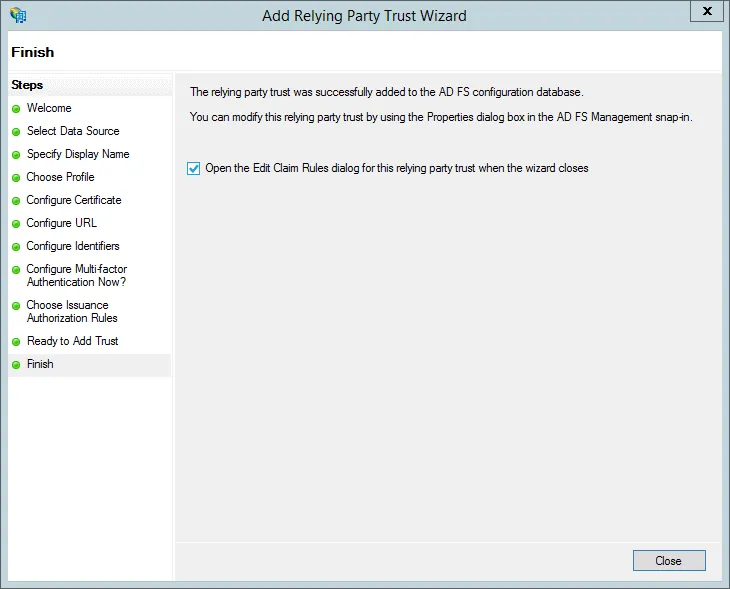
- You don’t need to change anything in the Ready to Add Trust step. Press Next.

- Select the Open the Edit Claim rules dialog for this relying party trust when the wizard closes checkbox and press Close.
Configure claim rules
- The Edit Claim Rules window should open automatically after adding the relying party trust. Press Add Rule… to create a new rule.
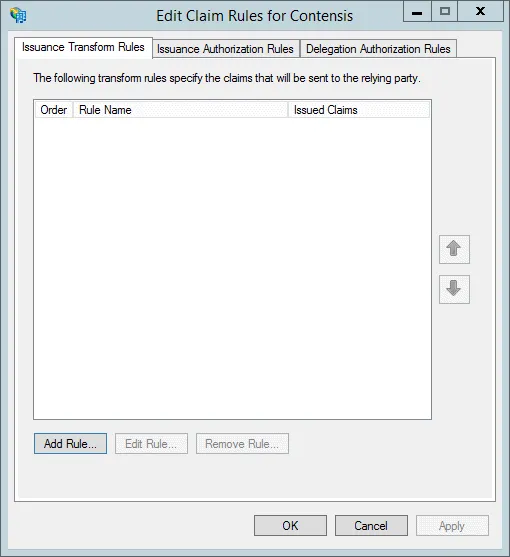
- Select Send LDAP Attributes as Claims from the Claim rule template list.
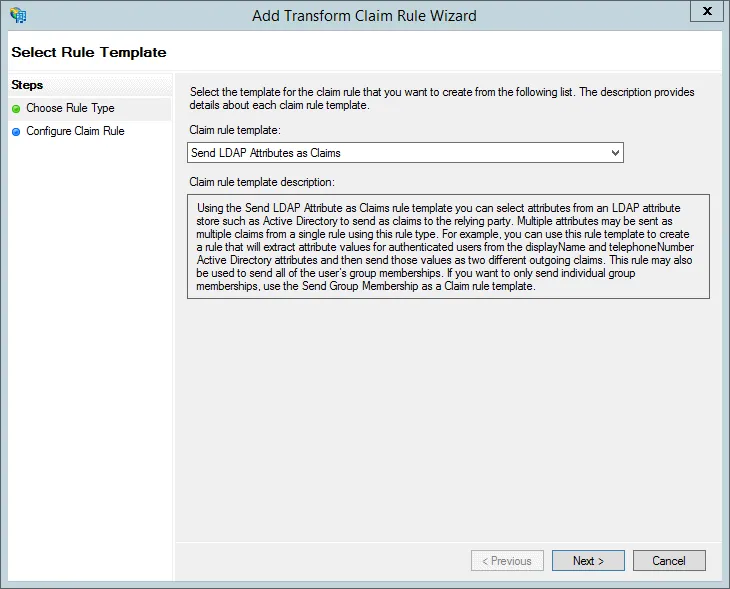
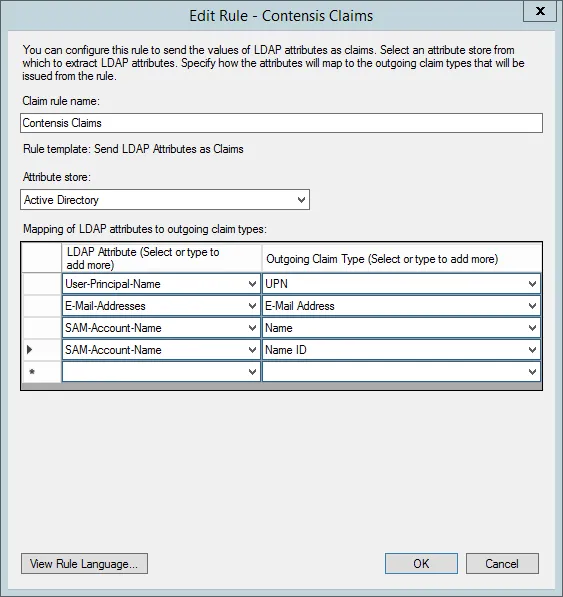
- Enter a Claim rule name e.g. Contensis claims
- Select Active Directory as the Attribute store
- As a minimum map the following LDAP attributes outlined in the table and press Next.
| LDAP attribute | Outgoing claim type |
|---|---|
| User-Principal-Name | UPN |
| E-Mail-Addresses | E-Mail Address |
| SAM-Account-Name | Name |
| SAM-Account-Name | Name ID |
If you want to populate the user’s first name and surname, you can also map the following LDAP attributes.
| LDAP attribute | Outgoing claim type |
|---|---|
| Given-Name | Given-Name |
| Surname | Surname |
You can also configure Contensis to automatically create groups which users are members of when the user first logs in. To enable this you need to map the following LDAP attribute.
| LDAP attribute | Outgoing claim type |
|---|---|
| Is-Member-Of-DL | Group |
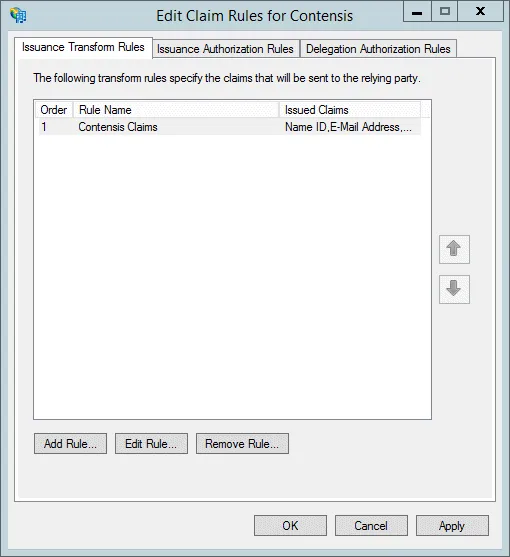
- You’ll now see the claim listed. Press Add Rule… to add another claim
Run AD synchronisation with single sign-on
You can continue to run the AD synchronisation feature alongside an AD FS integration. If you are running the sync then users and groups will be created within Contensis as normal and any AD FS users will be updated and moved into their relevant groups.
If you are running the AD Synchronisation and you have the global setting DirectoryServices_DeleteInvalidUsersAndGroups set to true then AD FS users will be deleted if they aren’t a member of the groups being synchronised.
It is recommended that all users allowed to log in via AD FS are included in the groups which are being synchronised via the AD synchronisation feature.
Test single sign-on in Contensis
- Once you have configured your AD FS server and set up AD FS in Contensis, you should see a new Sign in with AD FS button on the Contensis login screen.

- Press Sign in with AD FS to be redirected to your AD FS logon screen.
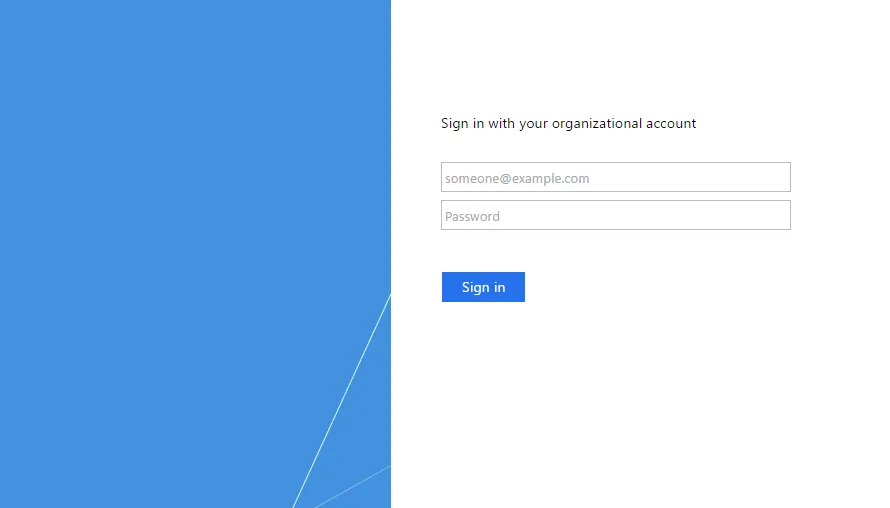
- Enter your username and password and press Sign in. You will be logged into Contensis.
If this is the first time a user has logged in, a user will be created in Contensis with a username which matches their AD username. If a Contensis user already exists with the same user name, then the user will be converted to an AD FS user. No permissions or group assignments will be lost.
All users created via an AD FS login are added to a system group called AD Users, this enables you to give the AD Users some default permissions.
Troubleshoot AD FS login problems
If you are having AD FS login problems then here are some things you might want to check are configured correctly and a debug step you could try.
CMS URL
- In the Management Console navigate to Global Settings.
- Look up the ContensisGuiURL setting and check if the Setting Value has https:// defined at the start of it (non-https will not work).
AD FS server configuration
Has the AD FS server been configured correctly Check this common cause of login problems very carefully - are all the necessary trusts and claims for Contensis present and configured correctly?
CMS settings
- In the Management Console navigate to Global Settings:
The ADFS_Enabled global setting should be set to 1.
The ADFS_MetadataEndpoint global setting should have the link to the metadata endpoint on your AD FS server. This will be in the following format:
https://adfs.contensis.com/FederationMetadata/2007-06/FederationMetadata.xml - Double check that you can access this from the CMS server. To do this you can logon to the server and run the following command in PowerShell:
Invoke-WebRequest https://adfs.contensis.com/FederationMetadata/2007-06/FederationMetadata.xml - UseBasicParsing
If the metadata endpoint is configured correctly you should get a StatusCode of 200 and the Content will start with <EntityDescriptor....
Machine.config machinekey validation
- Open the machine.config file on your CMS server. It can be found in c:\Windows\Microsoft.NET\Framework64\v4.0.30319\Config
- Search for the following <machineKey>, you will see something like:
<machineKey validationKey="E1D4A7ACE716CC17B9BE3F1794AB117E7CB771B878253727" decryptionKey="E8969B07BF46F3FF659E008495F1EA5163EBDC0E50B6024E" validation="SHA1"/>
Make sure that the validation property is set to SHA1 and not anything else. If it is set to something else, change it and then restart IIS.
Debug using verbose logging
Follow the steps below to setup tracing on IdentityServer and then attempt to login using ADFS or logout. Any issues should be seen in the logs.
Set up tracing on IdentityServer
- Add the xml above to the web.config file for the CMS instance, change the Contensis_DebugInfoLevel to Debug in the web.config.
- Ensure that the CMS has access to the directory specified in the initializeData setting.
- Save web.config.