Create an entry in a different language outside the translation workflow
Log in to add to favouritesYou can create an entry in a language that is not the default language for your project, outside of the normal translation workflow. This could be useful where the content is applicable only to a specific locale or you want to display a variation of a language, such as a dialect.
For a product that is available worldwide, product entries would normally be created for all languages. However, you may have a product that is specific to a country or region, where the default and other languages may not be required. In this situation, you'll need to create an entry for a specific language.
Create an entry for a specific language
Creating content in specific languages requires a user to be a member of an appropriate role that has support for the required language.
- Press the dropdown next to the New entry button. A menu will open.
- Select the New entry (other language) option. A list of content types will be displayed.
- Choose the content type you want to create an entry from. You'll be taken to a list of available languages for that content type.
- Select the required language.
- A new entry will be created and the selected language variation will open for editing.
- You can now populate the fields for the new language.
- Press Save after any changes – the minor version will increment upon each save. When you have finished, press Submit to send the entry for approval, or Publish if the workflow allows. Once approved and published the language variation will now be available through the Delivery API, without requiring the default language.
Adding additional language variations
In the scenario outlined at the beginning of this article, we mentioned a product specific to a country or region. Over time, you may find that the product (or other type of entry) may need to be made available in one or more other languages.
In this case, you'll need to locate the entry in the entry listing screen for the language the entry was created against and follow the steps below to add additional languages to the entry.
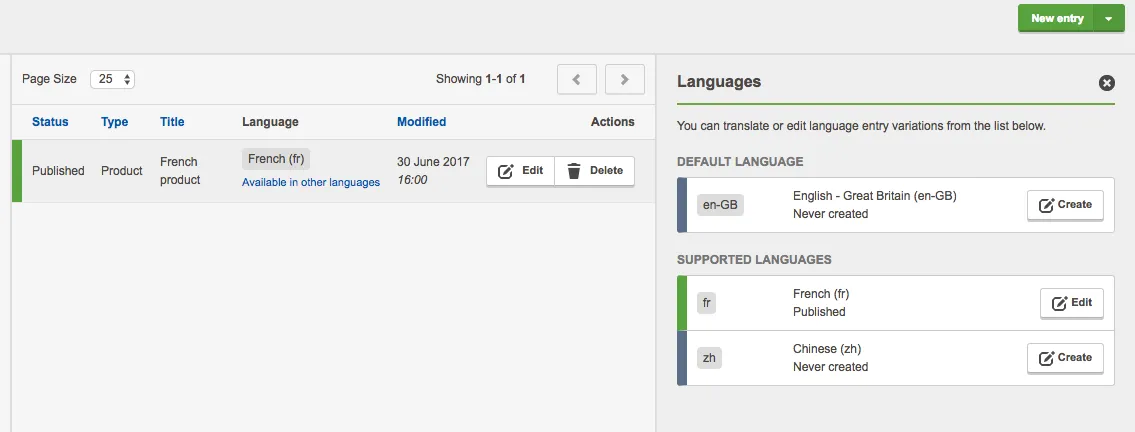
- In the entries listing screen, press the Show other languages link to open the language panel.
- The panel states will differ slightly to those shown when translating an entry from the default language. For example, you'll see a Create button instead of Translate, and states including No default langauge in place of Not yet translated.
- From the language panel, press Create on a language which has not yet been created. The language variation will open.
- You can repeat this process for each subsequent language.
Although language variations are part of the same entry, each variation is independent of other languages. This is true until the default language is created and published, at which point the translation workflow activates, and language variations are no longer independent of one another.
Note: The languages in which an entry can be created are determined by those which have been assigned to a project and enabled for a content type.